学了好长时间了,应该认真分析一个项目,了解一个项目的开发流程、顺序、模式等
第一章 - 项目搭建 1 系统设计 1.1 开发模式 采用前后端分离的开发模式
1.2 技术选型 前端:nodejs+NUXT+elementUI+vue
后端:springboot+springcloud+mybatis plus + mysql 5.7
1.3 技术架构 前后端分离的系统架构
1.4 微服务模块划分
模块名称
模块中文名称
tensquare_common
公共模块
tensquare_base
基础微服务
tensquare_article
文章微服务
tensquare_friend
交友微服务
tensquare_gathering
活动微服务
tensquare_qa
问答微服务
tensquare_recruit
招聘微服务
tensquare_user
用户微服务
tensquare_spit
吐槽微服务
tensquare_search
搜索微服务
tensquare_web
前台微服务网关
tensquare_manager
后台微服务网关
tensquare_eureka
注册中心
tensquare_config
配置中心
tensquare_sms
短信微服务
tensquare_notice
消息通知微服务
1.5 建数据库表结构分析 采用的分库分表设计,每个微服务模块为1个独立的数据库。
tensquare_article 文章
tensquare_base 基础
tensquare_friend 交友
tensquare_gathering 活动
tensquare_qa 问答
tensquare_recruit 招聘
tensquare_user 用户
tensquare_spit 吐槽
1.6 API文档 前后端约定的返回码列表:
状态描述
返回码
成功
20000
失败
20001
用户名或密码错误
20002
权限不足
20003
远程调用失败
20004
重复操作
20005
2 接口规范 十次方项目使用GET、POST、PUT、DELETE四种方法
幂等性:不论你请求多少次,资源的状态是一样的。
2.1 GET
==适合查询类的接口使用==
2.2 POST
不安全且不幂等
使用服务端管理的(自动产生)的实例号创建资源
创建子资源
部分更新资源
如果没有被修改,则不过更新资源(乐观锁)
==适合数据提交类的接口使用==
2.3 PUT
不安全但幂等
用客户端管理的实例号创建一个资源
通过替换的方式更新资源
如果未被修改,则更新资源(乐观锁)
==适合更新数据的接口使用==
2.4 DELETE
==适合删除数据的接口使用==
请求返回响应码:
代码
含义
==200==
(OK)- 如果现有资源已被更改
201
(created)- 如果新资源被创建
202
(accepted)- 已接受处理请求但尚未完成(异步处理)
301
(Moved Permanently)- 资源的URI被更新
303
(See Other)- 其他(如,负载均衡)
==400==
(bad request)- 指代坏请求
==404==
(not found)- 资源不存在
406
(not acceptable)- 服务端不支持所需表示
409
(conflict)- 通用冲突
412
(Precondition Failed)- 前置条件失败(如执行条件更新时的冲突)
415
(unsupported media type)- 接受到的表示不受支持
==500==
(internal server error)- 通用错误响应
503
(Service Unavailable)- 服务当前无法处理请求
3 项目开发准备 3.1 开发环境
虚拟系统环境 VMware Workstation
虚拟机系统 CentOS 7
容器 docker
JDK1.8
数据库 mysql 5.7
开发工具 idea
项目构建工具 maven
3.2 mysql建库建表 所有的第三方工具如mysql等都是运行在docker容器中的注:虚拟机的帐户名root 密码itcast
进入安装了docker的虚拟机中,按以下顺序执行命令
(1)下载镜像(此步可省略)
1 docker pull centos/mysql-57 -centos7
注:docker默认从国外的镜像网站拉取镜像,速度很慢。可以使用国内的阿里云镜像加速站点提升镜像拉取速度。具体步骤可以参考文档
docker配置国内镜像加速站点.pdf
(2)创建容器
1
2
docker run -di --name =tensquare_mysql -p 3306:3306 -e MYSQL_ROOT_PASSWORD =root centos/mysql-57-centos7
(3)连接MYSQL ,并执行资料中的建表脚本,创建article数据库
3.3 接口测试工具postman postman是一款强大网页调试工具
能够发送任何类型的HTTP 请求 (GET,HEAD, POST,PUT…)
附带任意数量的参数
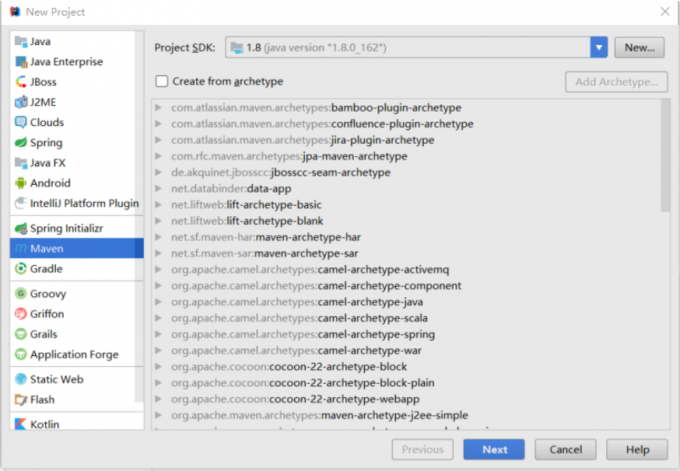
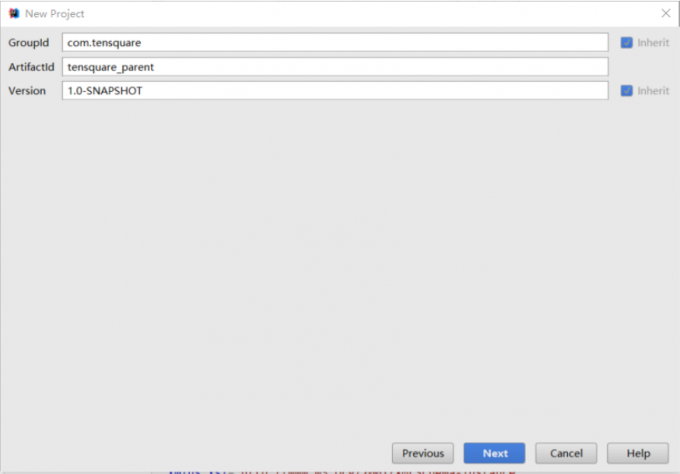
4 项目工程搭建 4.1 父工程搭建 创建项目类型为maven的父工程
1.选择file-new project,选择maven,点击next
2.GroupId填写com.tensquare,ArtifacetId填写tensquare_parent,点击next
3.点击Finash完成
4.修改pom.xml文件,添加以下内容
1 2 3 4 5 6 7 8 9 10 11 12 13 14 15 16 17 18 19 20 21 22 23 24 25 26 27 28 29 <parent > <groupId > org.springframework.boot</groupId > <artifactId > spring-boot-starter-parent</artifactId > <version > 2.1.4.RELEASE</version > </parent > <properties > <project.build.sourceEncoding > UTF-8</project.build.sourceEncoding > <project.reporting.outputEncoding > UTF-8</project.reporting.outputEncoding > <java.version > 1.8</java.version > <maven.compiler.source > 1.8</maven.compiler.source > <maven.compiler.target > 1.8</maven.compiler.target > <mybatisplus-spring-bootstarter.version > 1.0.5</mybatisplus-spring-bootstarter.version > <mybatisplus.version > 2.2.0</mybatisplus.version > <fastjson.version > 1.2.39</fastjson.version > <gson.version > 2.8.0</gson.version > </properties > <dependencies > <dependency > <groupId > org.springframework.boot</groupId > <artifactId > spring-boot-starter-web</artifactId > </dependency > <dependency > <groupId > org.springframework.boot</groupId > <artifactId > spring-boot-starter-test</artifactId > <scope > test</scope > </dependency > </dependencies >
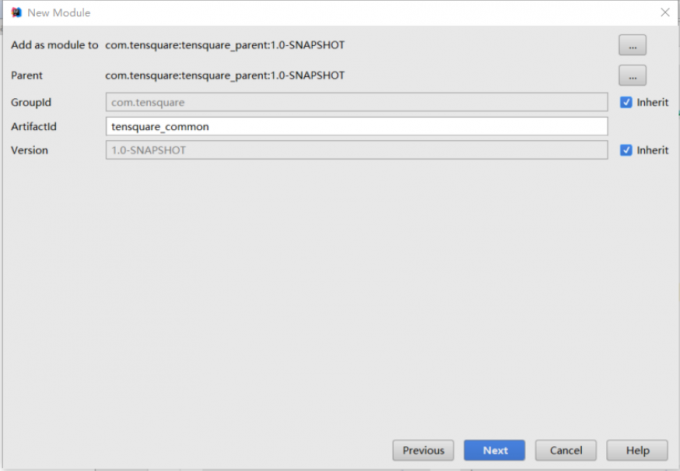
4.2 搭建公共子模块 4.2.1 搭建子模块步骤 1.右键点击父工程tensquare_parent,选择New->Module弹出窗口选择Maven,点击next
2.ArtifacetId填写tensquare_common,点击next
3.点击finish
4.2.1 创建公共实体类和工具类 1.新建com.tensquare.entity包,包下创建Result类,用于controller返回结果
1
2
3
4
5
6
7
8
9
10
11
12
13
14
15
16
17
18
19
20
21
22
23
24
25
26
27
28
29
30
31
32
33
34
35
36
37
38
39
40
41
42
43
44
45
46
47
48
49
50
51
52
53
54
55
56
57
58
59
60
61
62
63
64
65
66
package entity;public class Result private Boolean flag; private Integer code; private String message; private Object data; public Result () } public Result (Boolean flag, Integer code, String message) this .flag = flag; this .code = code; this .message = message; } @Override public String toString () return "Result{" + "flag=" + flag + ", code=" + code + ", message='" + message + '\'' + ", data=" + data + '}' ; } public Boolean getFlag () return flag; } public void setFlag (Boolean flag) this .flag = flag; } public Integer getCode () return code; } public void setCode (Integer code) this .code = code; } public String getMessage () return message; } public void setMessage (String message) this .message = message; } public Object getData () return data; } public void setData (Object data) this .data = data; } public Result (Boolean flag, Integer code, String message, Object data) this .flag = flag; this .code = code; this .message = message; this .data = data; } }
2.创建类PageResult,用于返回分页结果
1
2
3
4
5
6
7
8
9
10
11
12
13
14
15
16
17
18
19
20
21
22
23
24
25
26
27
28
29
30
31
32
33
34
35
36
37
38
39
40
package entity;import java.util.List;public class PageResult <T > private Long total; private List<T> rows; @Override public String toString () return "PageResult{" + "total=" + total + ", rows=" + rows + '}' ; } public PageResult () } public PageResult (Long total, List<T> rows) this .total = total; this .rows = rows; } public Long getTotal () return total; } public void setTotal (Long total) this .total = total; } public List<T> getRows () return rows; } public void setRows (List<T> rows) this .rows = rows; } }
3.返回码定义类
1
2
3
4
5
6
7
8
9
10
package entity;public class StatusCode public static final int OK = 20000 ; public static final int ERROR = 20001 ; public static final int LOGINERROR = 20002 ; public static final int ACCESSERROR = 20003 ; public static final int REMOTEERROR = 20004 ; public static final int REPERROR = 20005 ; }
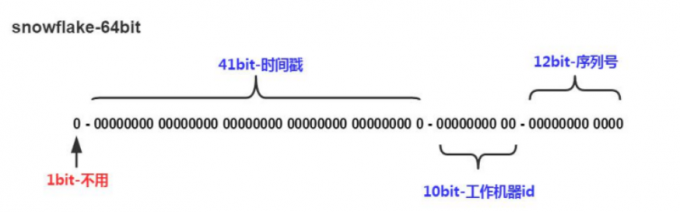
4.分布式ID生成器
附录/IdWorker.java
tensquare_common工程创建util包,将IdWorker.java直接拷贝到
不能使用数据库本身的自增功能来产生主键值,原因是生产环境为分片部署的。
41bit的时间戳可以支持该算法使用到2082年
10bit的工作机器id可以支持1024台机器
序列号支持1毫秒产生4096个自增序列id
整体上按照时间自增排序
整个分布式系统内不会产生ID碰撞
每秒能够产生26万ID左右
5 文章微服务-文章管理 5.1 模块搭建
在tensquare_parent项目下创建tensquare_article模块,创建过程参考第4.2节
修改tensquare_article模块的pom.xml文件,修改添加以下依赖
1 2 3 4 5 6 7 8 9 10 11 12 <dependencies > <dependency > <groupId > mysql</groupId > <artifactId > mysql-connector-java</artifactId > </dependency > <dependency > <groupId > com.tensquare</groupId > <artifactId > tensquare_common</artifactId > <version > 1.0-SNAPSHOT</version > </dependency > </dependencies >
3.创建com.tensquare.article包,并创建ArticleApplication类
1
2
3
4
5
6
7
8
9
10
11
12
13
14
15
16
17
18
19
20
21
22
23
package com.tensquare.article;import org.mybatis.spring.annotation.MapperScan;import org.springframework.boot.SpringApplication;import org.springframework.boot.autoconfigure.SpringBootApplication;import org.springframework.context.annotation.Bean;import util.IdWorker;@SpringBootApplication @MapperScan("com.tensquare.article.dao") public class ArticleApplication public static void main (String[] args) SpringApplication.run(ArticleApplication.class, args); } @Bean public IdWorker createIdWorker () return new IdWorker(1 , 1 ); } }
4.在resources文件夹下创建application.yml,并添加以下内容
1
2
3
4
5
6
7
8
9
10
server: port: 9004 spring: application: name: tensquare-article datasource: driver-class-name: com.mysql.jdbc.Driver url: jdbc:mysql://192.168.200.129:3306/tensquare_article?characterEncoding=utf-8 username: root password: root
5.2 文章管理-CRUD 5.2.1 表结构分析 使用Navicat连接虚拟机建库
tensquare_article数据库,tb_article表
文章表
tb_article
字段名称
字段含义
字段类型
备注
id
ID
文本
columnid
专栏ID
文本
userid
用户ID
文本
title
文章标题
文本
content
文章内容
文本
image
文章封面
文本
createtime
发表日期
日期
updatetime
修改日期
日期
ispublic
是否公开
文本
0:不公开
istop
是否置顶
文本
0:不置顶
visits
浏览量
整型
thumbup
点赞数
整型
comment
评论数
整型
state
审核状态
文本
0:未审核 1:已审核
channelid
所属频道
整型
关联频道表ID
url
URL地址
文本
type
文章类型
文本
0:分享
5.2.2 集成mybatisplus 1.在pom.xml文件中
1 2 3 4 5 6 7 8 9 10 11 12 13 14 15 <dependency > <groupId > com.baomidou</groupId > <artifactId > mybatisplus-spring-boot-starter</artifactId > <version > 1.0.5</version > </dependency > <dependency > <groupId > com.baomidou</groupId > <artifactId > mybatis-plus</artifactId > <version > ${mybatisplus.version}</version > </dependency >
2.在之前的application.yml文件中添加相关配置
1 2 3 4 5 6 7 8 9 10 11 12 13 14 15 mybatis-plus: typeAliasesPackage: com.tensquare.article.pojo global-config: id-type: 1 db-column-underline: false refresh-mapper: true configuration: map-underscore-to-camel-case: true cache-enabled: true lazyLoadingEnabled: true multipleResultSetsEnabled: true log-impl: org.apache.ibatis.logging.stdout.StdOutImpl
3.在启动类添加Mapper扫描注解
1
2
3
4
5
6
7
8
9
10
11
12
13
14
@SpringBootApplication @MapperScan("com.tensquare.article.dao") public class ArticleApplication public static void main (String[] args) SpringApplication.run(ArticleApplication.class, args); } @Bean public IdWorker createIdWorker () return new IdWorker(1 , 1 ); } }
5.2.3 查询所有文章和根据id号查询文章功能 1.在com.tenquare.article包下常见pojo包,并创建Article实体类
1
2
3
4
5
6
7
8
9
10
11
12
13
14
15
16
17
18
19
20
21
22
23
24
25
26
27
28
29
30
31
32
33
34
package com.tensquare.article.pojo;import com.baomidou.mybatisplus.annotations.TableId;import com.baomidou.mybatisplus.annotations.TableName;import com.baomidou.mybatisplus.enums.IdType;import java.io.Serializable;import java.util.Date;@TableName("tb_article") public class Article implements Serializable @TableId(type = IdType.INPUT) private String id; private String columnid; private String userid; private String title; private String content; private String image; private Date createtime; private Date updatetime; private String ispublic; private String istop; private Integer visits; private Integer thumbup; private Integer comment; private String state; private String channelid; private String url; private String type; }
2.编写Controller
1
2
3
4
5
6
7
8
9
10
11
12
13
14
15
16
17
18
19
20
21
@RestController @RequestMapping("article") public class ArticleController @Autowired private ArticleService articleService; @GetMapping public Result findAll () List list = articleService.findAll(); return new Rusult(true ,StatusCode.OK,"查询成功" ,list); } @GetMapping("{articleId}") public Result findById (@PathVariable String articleId) Article article = articleService.findById(articleId); return new Result(true ,Status.OK,"查询成功" ,article); } }
3.编写dao接口
1 public interface AricleDao extends BaseMapper <Article >
4.编写service层
1
2
3
4
5
6
7
8
9
10
11
12
13
14
15
16
@Service public class ArticleService @Autowried private ArticleDao articleDao; public List<Article> findAll () Article article = articleDao.selectById(1 ); return articleDao.selectList(null ); } public Article findById (String articleId) return articleDao.selectById(articleId); } }
5.2.4 添加文章、删除文章、修改文章 在相应层写入以下代码
1.Controller类
1 2 3 4 5 6 7 8 9 10 11 12 13 14 15 16 17 18 19 20 21 22 23 24 @PostMapping public Result save (@RequestBody Article article) articleService.save(article); return new Result(true , StatusCode.OK, "新增成功" ); } @PutMapping(value = "{articleId}") public Result updateById (@PathVariable String articleId, @RequestBody Article article) article.setId(articleId); articleService.updateById(article); return new Result(true , StatusCode.OK, "修改成功" ); } @DeleteMapping(value = "{articleId}") public Result deleteById (@PathVariable String articleId) articleService.deleteById(articleId); return new Result(true , StatusCode.OK, "删除成功" ); }
2.service类
1
2
3
4
5
6
7
8
9
10
11
12
13
14
15
16
17
18
19
20
21
22
23
24
25
26
27
28
29
30
31
32
33
@Autowired private IdWorker idWorker;public void save (Article article) String id = idWorker.nextId() + "" ; article.setId(id); article.setVisits(0 ); article.setComment(0 ); article.setThumbup(0 ); articleDao.insert(article); } public void updateById (Article article) articleDao.updateById(article); } public void deleteById (String articleId) articleDao.deleteById(articleId); }
5.2.5 条件查询和分页 1.条件查询
使用MybatisPlus提供的EntityWrapper对象封装的where查询条件,例如以下使用方式:
1 2 3 4 5 6 7 wrapper.eq(map.get(key) != null , key, map.get(key));
2.分页
使用 Mybatis Plus 提供的Page对象
向Mybatis Plus中注入PaginationInterceptor插件
新建config包,创建MybatisPlusConfig对象,添加下面的代码
1
2
3
4
5
6
7
8
9
10
11
12
13
14
package com.tensquare.article.config;import com.baomidou.mybatisplus.plugins.PaginationInterceptor;import org.springframework.context.annotation.Bean;import org.springframework.context.annotation.Configuration;@Configuration public class MyBatisPlusConfig @Bean public PaginationInterceptor createPaginationInterceptor () return new PaginationInterceptor(); } }
3.完整代码
AricleController中添加代码
1 2 3 4 5 6 7 8 9 10 11 12 13 14 15 16 @PostMapping(value = "search/{page}/{size}") public Result findByPage (@PathVariable Integer page, @PathVariable Integer size, @RequestBody Map<String, Object> map) Page<Article> pageData = articleService.findByPage(map, page, size); PageResult<Article> pageResult = new PageResult<>(pageData.getTotal(), pageData.getRecords()); return new Result(true , StatusCode.OK, "条件查询成功" ,pageResult); }
ArtcleService中代码
1
2
3
4
5
6
7
8
9
10
11
12
13
14
15
16
17
18
19
20
21
public Page<Article> findByPage (Map<String, Object> map, Integer page, Integer size) EntityWrapper<Article> wrapper = new EntityWrapper<>(); Set<String> keySet = map.keySet(); for (String key : keySet) { wrapper.eq(map.get(key) != null , key, map.get(key)); } Page<Article> pageData = new Page<>(page, size); List<Article> list = articleDao.selectPage(pageData, wrapper); pageData.setRecords(list); return pageData; }
附录 1 IdWorker.java 1 2 3 4 5 6 7 8 9 10 11 12 13 14 15 16 17 18 19 20 21 22 23 24 25 26 27 28 29 30 31 32 33 34 35 36 37 38 39 40 41 42 43 44 45 46 47 48 49 50 51 52 53 54 55 56 57 58 59 60 61 62 63 64 65 66 67 68 69 70 71 72 73 74 75 76 77 78 79 80 81 82 83 84 85 86 87 88 89 90 91 92 93 94 95 96 97 98 99 100 101 102 103 104 105 106 107 108 109 110 111 112 113 114 115 116 117 118 119 120 121 122 123 124 125 126 127 128 129 130 131 132 133 134 135 136 137 138 139 140 141 142 143 144 145 146 147 148 149 150 151 152 153 154 155 156 157 158 159 160 161 package util;import java.lang.management.ManagementFactory;import java.net.InetAddress;import java.net.NetworkInterface;public class IdWorker private final static long twepoch = 1288834974657L ; private final static long workerIdBits = 5L ; private final static long datacenterIdBits = 5L ; private final static long maxWorkerId = -1L ^ (-1L << workerIdBits); private final static long maxDatacenterId = -1L ^ (-1L << datacenterIdBits); private final static long sequenceBits = 12L ; private final static long workerIdShift = sequenceBits; private final static long datacenterIdShift = sequenceBits + workerIdBits; private final static long timestampLeftShift = sequenceBits + workerIdBits + datacenterIdBits; private final static long sequenceMask = -1L ^ (-1L << sequenceBits); private static long lastTimestamp = -1L ; private long sequence = 0L ; private final long workerId; private final long datacenterId; public IdWorker () this .datacenterId = getDatacenterId(maxDatacenterId); this .workerId = getMaxWorkerId(datacenterId, maxWorkerId); } public IdWorker (long workerId, long datacenterId) if (workerId > maxWorkerId || workerId < 0 ) { throw new IllegalArgumentException(String.format("worker Id can't be greater than %d or less than 0" , maxWorkerId)); } if (datacenterId > maxDatacenterId || datacenterId < 0 ) { throw new IllegalArgumentException(String.format("datacenter Id can't be greater than %d or less than 0" , maxDatacenterId)); } this .workerId = workerId; this .datacenterId = datacenterId; } public synchronized long nextId () long timestamp = timeGen(); if (timestamp < lastTimestamp) { throw new RuntimeException(String.format("Clock moved backwards. Refusing to generate id for %d milliseconds" , lastTimestamp - timestamp)); } if (lastTimestamp == timestamp) { sequence = (sequence + 1 ) & sequenceMask; if (sequence == 0 ) { timestamp = tilNextMillis(lastTimestamp); } } else { sequence = 0L ; } lastTimestamp = timestamp; long nextId = ((timestamp - twepoch) << timestampLeftShift) | (datacenterId << datacenterIdShift) | (workerId << workerIdShift) | sequence; return nextId; } private long tilNextMillis (final long lastTimestamp) long timestamp = this .timeGen(); while (timestamp <= lastTimestamp) { timestamp = this .timeGen(); } return timestamp; } private long timeGen () return System.currentTimeMillis(); } protected static long getMaxWorkerId (long datacenterId, long maxWorkerId) StringBuffer mpid = new StringBuffer(); mpid.append(datacenterId); String name = ManagementFactory.getRuntimeMXBean().getName(); if (!name.isEmpty()) { mpid.append(name.split("@" )[0 ]); } return (mpid.toString().hashCode() & 0xffff ) % (maxWorkerId + 1 ); } protected static long getDatacenterId (long maxDatacenterId) long id = 0L ; try { InetAddress ip = InetAddress.getLocalHost(); NetworkInterface network = NetworkInterface.getByInetAddress(ip); if (network == null ) { id = 1L ; } else { byte [] mac = network.getHardwareAddress(); id = ((0x000000FF & (long ) mac[mac.length - 1 ]) | (0x0000FF00 & (((long ) mac[mac.length - 2 ]) << 8 ))) >> 6 ; id = id % (maxDatacenterId + 1 ); } } catch (Exception e) { System.out.println(" getDatacenterId: " + e.getMessage()); } return id; } }