之前建立实体类,需要手动慢慢建立,很没有效率,了解了逆向工程之后,确实很方便
1.返回json数据
1
2
3
4
5
6
7
8
9
10
11
12
13
14
15
16
17
18
19
20
| package com.gyl.springboot.web;
import org.springframework.stereotype.Controller;
import org.springframework.web.bind.annotation.RequestMapping;
import org.springframework.web.bind.annotation.ResponseBody;
@Controller
public class IndexController {
@RequestMapping(value = "/say")
public @ResponseBody Object m(String message){
return "Say:Hello" + message;
}
@RequestMapping(value = "/mapvalue")
public @ResponseBody Map<String, Object> mapvalue() {
Map<String, Object> retMap = new HashMap<String, Object>();
retMap.put("message", "hello SpringBoot");
return retMap;
}
}
|
在浏览器中url后面加上?message=World
就会显示Say:HelloWorld
访问localhost:8080/mapvalue可以显示
message:hello SpringBoot
2.核心配置文件
2.1 三类配置文件比较
properties
1
2
| server.port=9090
server.servlet.context-path=/
|
yml和yaml格式一样,只是名字不一样
1
2
3
4
| server:
port:
servlet:
context-path: /
|
当yml/properties文件同时存在时,以properties文件为准
3.多环境下核心配置文件
开发环境—>测试环境—>准生产环境—>生产环境
yml和properties一样,只是后缀不一样
主核心配置文件
application.properties
1
| spring.profiles.active=dev
|
多配置文件要以application-开头
application-dev.properties开发环境
1
2
| server.port=9090
server.servlet.context-path=/dev
|
application-test.properties测试环境
1
2
| server.port=9090
server.servlet.context-path=/test
|
application-ready.properties准生产环境
1
2
| server.port=9090
server.servlet.context-path=/ready
|
application-product.properties生产环境
1
2
| server.port=9090
server.servlet.context-path=/product
|
4.集成jsp
首先,创建webapp资源文件夹,并设置该文件夹为web项目文件夹。
之后,在pom.xml中引入SpringBoot内嵌tomcat对jsp的解依赖
1
2
3
4
| <dependency>
<groupId>org.apache.tomcat.embed</groupId>
<artifactId>tomcat-embed-jasper</artifactId>
</dependency>
|
然后,在pom.xml下指定编译路径在\\中
1
2
3
4
5
6
7
8
9
10
11
12
| <resources>
<resource>
<directory>src/main/webapp</directory>
<targetPath>META-INF/resources</targetPath>
<includes>
<include>*.*</include>
</includes>
</resource>
</resources>
|
最后,在application.properties中配置视图解析器
1
2
| spring.mvc.view.prefix=/
spring.mvc.view.suffix=.jsp
|
5.集成MyBatis依赖
导入MaBatis依赖支持
1
2
3
4
5
6
7
8
9
10
11
12
|
<dependency>
<groupId>mysql</groupId>
<artifactId>mysql-connector-java</artifactId>
</dependency>
<dependency>
<groupId>org.mybatis.spring.boot</groupId>
<artifactId>mybatis-spring-boot-starter</artifactId>
<version>RELEASE</version>
</dependency>
|
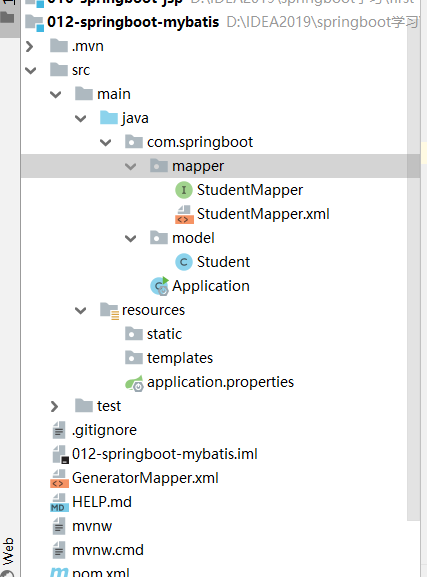
5.1 MyBatis逆向工程
1.GeneratorMapper.xml
在根目录下创建GeneratorMapper.xml
1
2
3
4
5
6
7
8
9
10
11
12
13
14
15
16
17
18
19
20
21
22
23
24
25
26
27
28
29
30
31
32
33
34
35
36
37
38
39
40
41
42
43
44
45
46
47
48
49
50
51
52
53
| <?xml version="1.0" encoding="UTF-8"?>
<!DOCTYPE generatorConfiguration
PUBLIC "-//mybatis.org//DTD MyBatis Generator Configuration 1.0//EN"
"http://mybatis.org/dtd/mybatis-generator-config_1_0.dtd">
<generatorConfiguration>
<classPathEntry
location="D:\JavaTools\Maven\Mavenrespository\mysql\mysql-connector-java\8.0.22\mysql-connector-java-8.0.22.jar"/>
<context id="testTables" targetRuntime="MyBatis3">
<commentGenerator>
<property name="suppressAllComments" value="true"/>
</commentGenerator>
<jdbcConnection driverClass="com.mysql.cj.jdbc.Driver"
connectionURL="jdbc:mysql://localhost:3306/springboot_student?useUnicode=true&characterEncoding=utf-8&useSSL=false&serverTimezone=GMT%2B8"
userId="root"
password="root">
<property name="nullCatalogMeansCurrent" value="true"/>
</jdbcConnection>
<javaModelGenerator targetPackage="com.springboot.model"
targetProject="src/main/java">
<property name="enableSubPackages" value="false"/>
<property name="trimStrings" value="false"/>
</javaModelGenerator>
<sqlMapGenerator targetPackage="com.springboot.mapper"
targetProject="src/main/java">
<property name="enableSubPackages" value="false"/>
</sqlMapGenerator>
<javaClientGenerator type="XMLMAPPER"
targetPackage="com.springboot.mapper"
targetProject="src/main/java">
<property name="enableSubPackages" value="false"/>
</javaClientGenerator>
<table tableName="t_student" domainObjectName="Student"
enableCountByExample="false"
enableUpdateByExample="false"
enableDeleteByExample="false"
enableSelectByExample="false"
selectByExampleQueryId="false"/>
</context>
</generatorConfiguration>
|
2.在pom.xml文件中导入MyBatis-generator插件
1
2
3
4
5
6
|
<dependency>
<groupId>org.mybatis.spring.boot</groupId>
<artifactId>mybatis-spring-boot-starter</artifactId>
<version>2.1.4</version>
</dependency>
|
1
2
3
4
5
6
7
8
9
10
11
| <plugin>
<groupId>org.mybatis.generator</groupId>
<artifactId>mybatis-generator-maven-plugin</artifactId>
<version>1.3.6</version>
<configuration>
<configurationFile>GeneratorMapper.xml</configurationFile>
<verbose>true</verbose>
<overwrite>true</overwrite>
</configuration>
</plugin>
|
然后查看生成的StudentMapper.xml
1
2
3
4
5
6
7
8
9
10
11
12
13
14
15
16
17
18
19
20
21
22
23
24
25
26
| <resultMap id="BaseResultMap" type="com.springboot.model.Student">
<id column="id" jdbcType="INTEGER" property="id" />
<result column="name" jdbcType="VARCHAR" property="name" />
<result column="age" jdbcType="INTEGER" property="age" />
</resultMap>
<sql id="Base_Column_List">
id, name, age
</sql>
|
3.指定资源文件夹
在pom.xml文件中的build下添加,扫描StudentMapper.xml
1
2
3
4
5
6
7
8
9
|
<resources>
<resource>
<directory>src/main/java</directory>
<includes>
<include>**/*.xml</include>
</includes>
</resource>
</resources>
|
4.配置application.properties文件
1
2
3
4
5
6
7
8
9
10
|
server.port=9090
server.servlet.context-path=/
spring.datasource.driver-class-name=com.mysql.cj.jdbc.Driver
spring.datasource.url=jdbc:mysql://localhost:3306/springboot_student?useUnicode=true&characterEncoding=utf-8&useSSL=false&serverTimezone=GMT%2B8
spring.datasource.username=root
spring.datasource.password=root
|
5.2 业务逻辑
Controller—>Service—>ServiceImpl
先Controller
1
2
3
4
5
6
7
8
9
10
11
12
| @Controller
public class StudentController{
@Autowired
private StudentService studentService;
@RequestMapping(value = "/student")
public @ResponseBody Student queryStudentById(Integer id){
Student student = studentService.queryStudentById(id);
return student;
}
}
|
然后写Service层
1
2
3
4
| public interface StudentService {
Student queryStudentById(Integer id);
}
|
再写ServiceImpl类
1
2
3
4
5
6
7
8
9
| @Service
public class StudentServiceImpl implements StudentService{
@Autowired
private StudentMapper studentMapper;
@Override
public Student queryStudentById(Integer id){
return studentMapper.selectByPrimaryKey(id);
}
}
|
在入口类上写上@MapperScan(basePackages = “”)注解
5.3 MyBatis映射文件方法有两种
当接口类和xml文件在一块时,在pom.xml中的build标签中添加
1
2
3
4
5
6
7
8
9
|
<resources>
<resource>
<directory>src/main/java</directory>
<includes>
<include>**/*.xml</include>
</includes>
</resource>
</resources>
|
在resource文件夹中新建mapper文件夹中,放入StudentMapper.xml,在application.properties中写入以下代码
1
2
3
4
5
6
7
8
9
10
11
12
13
|
server.port=9090
server.servlet.context-path=/
spring.datasource.driver-class-name=com.mysql.cj.jdbc.Driver
spring.datasource.url=jdbc:mysql://localhost:3306/springboot_student?useUnicode=true&characterEncoding=utf-8&useSSL=false&serverTimezone=GMT%2B8
spring.datasource.username=root
spring.datasource.password=root
mybatis.mapper-locations=classpath:mapper/*.xml
|
6.集成Redis依赖
1.在pom.xml中添加以下依赖
1
2
3
4
5
|
<dependency>
<groupId>org.springframework.boot</groupId>
<artifactId>spring-boot-starter-data-redis</artifactId>
</dependency>
|
2.配置application.properties
1
2
3
4
|
spring.redis.host=localhost
spring.redis.port=6379
spring.redis.password=root
|